About the Supply and Demand Indicator
The Supply and Demand indicator for MT4 displays important zones of supply and demand for any currency pair and timeframe.
Zones of supply and demand can be used to trade either market breakouts or to trade possible trend reversals.
In trending markets, look for market breakouts.
For example, in an uptrending market, watch for a possible break of the demand zone and go long.
Conversely, in a downtrending market, watch for a possible break of the supply zone and go short.
It is also an interesting indicator to trade “buy on dips” in an uptrend or “sell on rallies” in a downtrend.
In an uptrending market, look for a pullback towards the supply zone (support area).
In a downtrending market, look for a rally towards the demand zone (resistance area).
Free Download
Download the “supply-and-demand.mq4” MT4 indicator
Key Features
- Automatically identifies supply and demand zones.
- Supports breakout and pullback trading strategies.
- Visual zone is displayed directly on the chart.
- Useful in trending and corrective market phases.
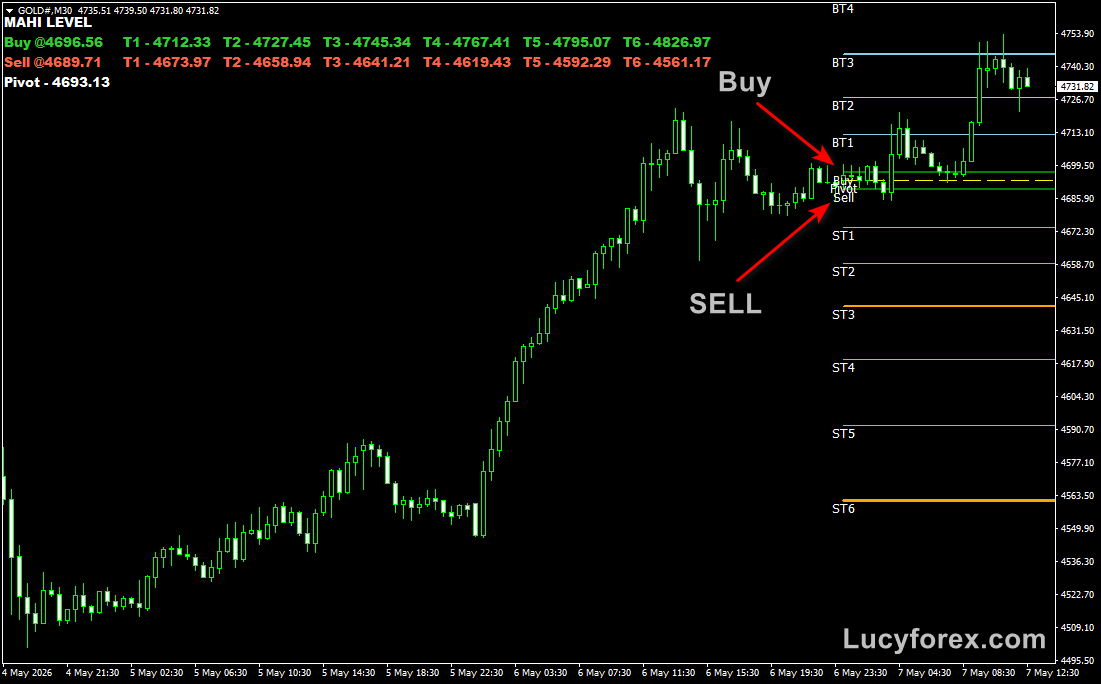
Indicator Chart
The image shows the Supply and Demand Indicator plotted as shaded zones on the price chart.
These zones highlight areas where price previously reacted with strength.
Traders use the chart to monitor how price behaves near each zone, watching for either strong breakouts or controlled pullbacks within an established trend.

Guide to Trade with Supply and Demand Indicator
Buy Rules
- Confirm the overall market trend is bullish.
- Watch price approach a demand zone during a pullback.
- Open a buy trade if price breaks above the demand zone.
- Trade only when momentum aligns with the main trend.
Sell Rules
- Confirm the overall market trend is bearish.
- Watch price approach a supply zone during a rally.
- Open a sell trade if price breaks below the supply zone.
- Avoid trades that go against trend direction.
Stop Loss
- Place the stop loss beyond the opposite side of the zone.
- Allow a small buffer to avoid false breaks.
- Adjust stop distance based on timeframe volatility.
Take Profit
- Close the trade at the next visible supply or demand zone.
- Exit early if price fails to move away from the zone.
- Trail profits once price moves strongly in your favor.
Supply and Demand MT4 and Lucky Reversal MT4 Forex Strategy
This MT4 strategy combines key zone analysis from the Supply and Demand Metatrader 4 Forex Indicator with trend reversal signals from the Lucky Reversal Indicator MT4.
The Supply and Demand indicator highlights important support and resistance areas using green blocks for demand zones and red blocks for supply zones.
The Lucky Reversal Indicator shows blue arrows for bullish reversals and red arrows for bearish reversals.
Combining these tools allows traders to enter trades at high-probability reversal points near key supply or demand zones.
This strategy is designed for day trading on M5, M15, and H1 charts.
It is particularly useful for traders who want to capture intraday price swings by entering trades when the market reaches significant supply or demand areas and confirms a reversal with the Lucky Reversal signal.
Buy Entry Rules
- Price must reach a green demand zone highlighted by the Supply and Demand indicator.
- A blue arrow must appear on the Lucky Reversal indicator confirming a bullish reversal.
- Enter a buy trade at the close of the candle showing the blue arrow.
- Place the stop loss slightly below the demand zone to protect against false breakouts.
- Set take profit near the next red supply zone or a predefined target of 20–30 pips depending on the timeframe.
- Close the trade early if a red arrow appears or price falls below the demand zone.
Sell Entry Rules
- Price must reach a red supply zone highlighted by the Supply and Demand indicator.
- A red arrow must appear on the Lucky Reversal indicator confirming a bearish reversal.
- Enter a sell trade at the close of the candle showing the red arrow.
- Place the stop loss slightly above the supply zone to protect against false breakouts.
- Set take profit near the next green demand zone or a predefined target of 20–30 pips depending on the timeframe.
- Close the trade early if a blue arrow appears or price rises above the supply zone.
Advantages
- Combining supply and demand zones with reversal signals increases the accuracy of trade entries.
- Visual representation of zones and arrows makes spotting trades intuitive and fast.
- Works on multiple timeframes, allowing flexibility for scalping or longer intraday trades.
- Helps traders enter trades near key market turning points, reducing the risk of chasing price moves.
- A simple, rule-based approach is suitable for both beginner and advanced traders.
- Supports trading across a variety of currency pairs, providing frequent opportunities.
Drawbacks
- Requires constant attention on lower timeframes to act on quick reversal signals.
- Profit targets can be affected by spreads and slippage, especially in fast-moving pairs.
- Effectiveness may vary for exotic pairs with lower liquidity and wider spreads.
Case Study 1
On EURUSD M5 during the London session, price reached a green demand zone and the Lucky Reversal indicator displayed a blue arrow.
A buy trade was entered and closed for 18 pips when price approached the next red supply zone, successfully capturing the intraday bullish swing.
Case Study 2
On GBPCAD M15 during the New York session, price reached a red supply zone and the Lucky Reversal indicator displayed a red arrow.
A sell trade was initiated and concluded for 54 pips as price moved down toward the next green demand zone, effectively following the intraday bearish momentum.
Strategy Tips
- Only take trades when the reversal arrow aligns with the supply or demand zone for stronger confirmation.
- Use lower timeframes like M5 for quicker intraday entries and M15 or H1 for more stable setups.
- Avoid trading around major news events to reduce the likelihood of stop-loss triggers.
- Adjust stop losses slightly beyond the zone boundaries to allow room for minor price fluctuations.
- Partial profit-taking near key levels can help secure gains while letting trends continue.
- Be patient and wait for both zone touch and reversal arrow confirmation before entering a trade.
Download Now
Download the “supply-and-demand.mq4” Metatrader 4 indicator
FAQ
Is this indicator better for breakouts or reversals?
It supports both approaches. Breakouts tend to perform better in strong trends, while reversals work best near mature moves.
Do supply and demand zones repaint?
Zones may adjust as new price data forms, but confirmed zones remain visible once established.
Can beginners use this indicator?
Yes, the visual zone display makes it easy to understand where price reactions are likely to occur.
Should this indicator be used alone?
It works best when combined with trend or momentum indicators to confirm trade direction.
Summary
The Supply and Demand Indicator gives traders a structured way to analyze price behavior around key market zones.
By identifying areas where strong buying or selling previously occurred, it helps traders anticipate future reactions.
Its ability to support breakout trades, pullback entries, and potential reversals makes it a flexible addition to many MT4 strategies.
When paired with trend confirmation, the indicator becomes a reliable tool for trading dynamic market conditions.